Tips for Concrete Removal and Disposal
August 29, 2025
Why You Need Professional Demolition Cleanup Services
August 29, 2025How to Plan for Shed Demolition and Cleanup
Assessing the Shed’s Condition and Materials
Before embarking on the journey of shed demolition, it’s crucial to thoroughly assess the structure’s condition. Examine the materials used—be it wood, metal, or a combination—to understand the complexity of the task ahead. Look for signs of wear, rot, or damage that might affect the demolition process. Additionally, check for hazardous materials such as asbestos or lead paint, which require special handling and disposal methods. Understanding these factors will help in planning the appropriate tools and safety measures needed for the job.
Equally important is evaluating the shed’s foundation and structural integrity. Determine whether the shed is anchored to a concrete slab, wooden deck, or simply resting on the ground. This assessment will influence the demolition approach, as different foundations require different techniques. For instance, a shed on a concrete slab may necessitate the use of a jackhammer or sledgehammer to break through the foundation. By thoroughly inspecting these aspects, you can devise a safe and efficient demolition plan tailored to your shed’s specific conditions.
Obtaining Necessary Permits and Legal Considerations
Before proceeding with shed demolition, it’s essential to check local regulations and obtain any necessary permits. Many jurisdictions require permits for demolition projects, especially if the shed is attached to utilities like electricity or water. Failing to secure the appropriate permits can result in fines or complications during the cleanup process. Contact your local building authority to inquire about the specific requirements in your area.
Additionally, consider the environmental impact of the demolition. Some materials may be recyclable, while others require special disposal methods. Research local recycling centers or hazardous waste disposal sites to ensure that materials are disposed of responsibly. By adhering to legal requirements and environmental guidelines, you contribute to a safer and more sustainable demolition process.

Gathering the Right Tools and Equipment
Equipping yourself with the proper tools is vital for a successful shed demolition. Basic tools include a sledgehammer, crowbar, reciprocating saw, and safety gear such as gloves, goggles, and sturdy footwear. Depending on the shed’s construction, you may also need specialized equipment like a ladder for accessing the roof or a jackhammer for breaking through concrete foundations. Ensure that all tools are in good working condition and that you have a clear understanding of how to use them safely.
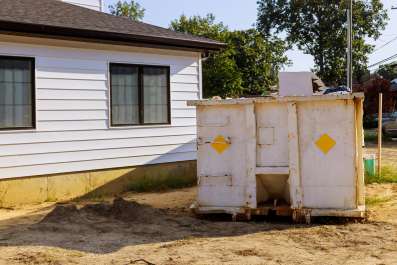
In some cases, renting equipment might be more cost-effective than purchasing. Rental services often provide high-quality tools and machinery suited for demolition tasks. Consider renting a dumpster to manage debris disposal efficiently. Having the right tools at your disposal not only makes the demolition process smoother but also enhances safety by reducing the risk of accidents and injuries.
Clearing the Area and Preparing the Site
Prior to demolition, clear the surrounding area of any obstacles or items that could impede the process. Remove furniture, tools, or personal belongings from the vicinity to create a safe working environment. Trim back any overgrown vegetation or branches that may obstruct access to the shed. Establish a designated work zone and mark it clearly to prevent unauthorized entry during the demolition.
Preparing the site also involves securing the perimeter to protect nearby structures and landscaping. Use barriers or caution tape to delineate the work area and warn others of potential hazards. By taking these preparatory steps, you ensure a safer and more organized demolition process, minimizing the risk of accidents and damage to surrounding property.
Disconnecting Utilities and Services
If your shed is connected to utilities such as electricity, water, or gas, it’s imperative to disconnect these services before commencing demolition. Contact the relevant utility companies to schedule disconnections and ensure that all services are safely terminated. For electrical connections, it may be necessary to hire a licensed electrician to handle the disconnection process.
In addition to utilities, check for any other services connected to the shed, such as internet or cable lines. These should also be disconnected to prevent damage during demolition. By addressing all utility connections beforehand, you mitigate the risk of accidents and ensure a smoother demolition process.
Dismantling the Shed Structure
With preparations complete, begin the demolition by dismantling the shed structure systematically. Start with the roof, removing shingles or panels to expose the underlying framework. Proceed to the walls, loosening fasteners and carefully taking down sections piece by piece. If the shed has windows or doors, remove these elements first to prevent injury and facilitate easier access to the rest of the structure.
When dismantling, work from top to bottom to maintain control over falling debris and to prevent the structure from collapsing unexpectedly. Use appropriate tools for each task, such as a hammer or crowbar for removing nails, and a saw for cutting through materials. Take your time to ensure each step is completed safely and thoroughly, as rushing can lead to accidents or incomplete demolition.
Sorting and Disposing of Debris
After dismantling the shed, sort the debris into categories: wood, metal, concrete, and general waste. This segregation facilitates recycling and proper disposal. For recyclable materials, research local recycling centers that accept construction debris. Many centers offer drop-off services for wood, metal, and other materials, helping to reduce landfill waste.
For non-recyclable materials, contact your local waste management service to arrange for proper disposal. Some items, like treated wood or certain paints, may require special handling due to environmental regulations. By responsibly managing the debris, you contribute to a cleaner environment and comply with local disposal laws.
Cleaning the Site and Final Inspection
Once all debris has been removed, thoroughly clean the demolition site. Sweep the area to remove smaller particles and check for any remaining nails or sharp objects that could pose a hazard. Inspect the ground for uneven surfaces or holes that may have been created during demolition and fill them in to restore the landscape.
Conduct a final inspection to ensure that all aspects of the demolition and cleanup have been completed satisfactorily. Verify that all utilities have been properly disconnected, the site is free of debris, and the area is safe for use. Address any remaining issues promptly to prevent future complications and to leave the space ready for its next purpose.
Considering Professional Shed Demolition Services
While DIY shed demolition is feasible, it can be labor-intensive and fraught with challenges. Hiring professional demolition services can alleviate these burdens, providing expertise and efficiency. Professionals are equipped with the necessary tools and experience to handle the demolition safely and effectively.
When selecting a demolition service, consider factors such as reputation, licensing, and insurance. Obtain multiple quotes to ensure competitive pricing and inquire about the scope of services offered. By choosing a reputable professional service, you can ensure that the shed demolition and cleanup are conducted to high standards, saving time and reducing stress.
Conclusion
Planning for shed demolition and cleanup involves careful assessment, preparation, and execution. By evaluating the shed’s condition, obtaining necessary permits, gathering appropriate tools, and following safety protocols, you can ensure a successful project. Whether undertaking the task yourself or hiring professionals, a well-executed demolition and cleanup process will leave your space ready for its next chapter.
For residents in Santa Rosa, CA, seeking assistance with shed demolition and cleanup, North Bay Junk Removal offers expert services. Their team is equipped to handle all aspects of the project, from dismantling to debris removal. Contact them at 707-478-6817 to schedule a consultation and ensure your shed demolition is handled efficiently and professionally.


