Before pulling up the first corner, the area must be cleared of furniture, decor, and anything that might get in the way. Emptying the space makes the work safer and more manageable. It also gives you the freedom to move without tripping over chairs or catching tools on loose objects. Think of it as setting the stage for a cleaner, smoother job. Even small items like floor lamps or rugs should be removed to avoid damage.
Once the room is clear, a quick sweep or vacuum can remove surface dirt that might otherwise get into the air during the process. This preparation stage also provides a good chance to check for any delicate surfaces nearby that should be protected. Covering doorways and vents helps control dust. Spending a little extra time here can save hours of cleanup later and ensures nothing important gets damaged in the process.
Identifying the Type of Carpet Installation
Not all carpets are attached the same way. Some are tacked down with strips along the edges, while others are glued directly to the floor. Understanding which type you are working with can help you choose the right tools and approach. Tacked carpets are generally easier to remove, but glued carpets require more patience and a different set of strategies to avoid damaging the subfloor.
Check the edges by gently lifting a corner to see what you’re dealing with. You may find staples, nails, or adhesive. This inspection will guide you in gathering tools like pliers, pry bars, or floor scrapers. Knowing the installation style means fewer surprises once the removal starts. It also allows you to plan your timeline more realistically since some methods take longer than others to undo properly.
Cutting the Carpet into Manageable Sections
One of the easiest ways to make carpet removal less overwhelming is to cut it into sections that you can handle without straining yourself. Large rolls can be awkward, heavy, and difficult to maneuver through doorways. Smaller pieces make disposal and transportation much simpler. A sharp utility knife can slice through the carpet backing, making neat, straight cuts.
Start at one corner and work across the room, creating strips about three to four feet wide. Roll each section as you go, securing it with tape to keep it tight. By reducing the weight and size of each piece, you not only make lifting easier but also minimize the risk of injury. This method also keeps the work area cleaner since you’re not dragging a full-sized carpet around the house.
Pulling the Carpet Away from Tack Strips
For carpet secured by tack strips, the removal process begins by loosening one edge. A pair of pliers can help grip the fibers, while a pry bar can lift the edge away from the sharp tacks holding it in place. Work slowly along the wall, pulling the carpet back in sections so you can maintain control.
Once the first side is free, you can move along the remaining edges. Be cautious of the small, sharp points on tack strips as they can easily cause cuts. Wearing gloves during this step is a smart precaution. Tack strips themselves can be removed later, but focusing on the carpet first ensures the project moves forward steadily.
Dealing with Carpet Padding
Beneath the carpet lies the padding, which is often stapled or glued to the floor. While it may seem soft and harmless, old padding can crumble apart, leaving bits stuck to the subfloor. If it’s stapled down, pliers can pull the staples out efficiently. For glued padding, a floor scraper works best to loosen the material.
Padding removal is important because it prepares the subfloor for whatever flooring comes next. Skipping this step can leave uneven surfaces that affect the look and stability of the new floor. It’s also a good opportunity to inspect the subfloor for any damage, such as water stains or rot, that may need repair before installation continues.
Removing Tack Strips Safely
Once the carpet and padding are out of the way, tack strips remain as the final barrier before a bare floor is revealed. These strips are lined with small nails and require careful handling to avoid injury. A flat pry bar positioned under the strip and tapped with a hammer can lift it away from the subfloor in small sections.
Since tack strips are often brittle, they can break during removal, so take your time to ensure all pieces are collected. Wearing gloves and eye protection is wise, as nails can snap loose unexpectedly. When the strips are gone, the floor should be swept to remove any remaining debris or loose nails.
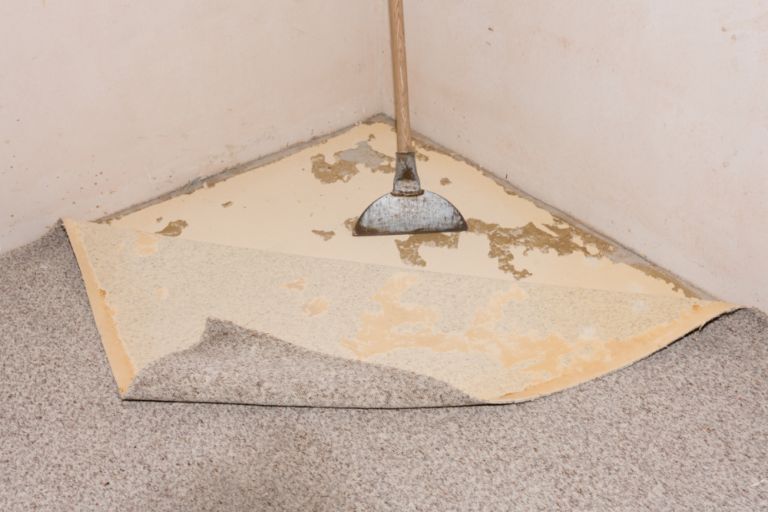
Addressing Adhesive Residue
If the carpet or padding was glued down, the subfloor might be left with patches of hardened adhesive. These rough spots can cause problems for new flooring, so they should be removed. A floor scraper is effective for chipping away thick areas, while adhesive remover can dissolve stubborn spots for easier scraping.
Depending on the size of the project, this can be one of the most time-consuming parts of carpet removal. Patience is key. Working in small sections and wiping away loosened residue as you go can help keep the job manageable. The cleaner and smoother the surface, the better the results when laying new flooring.
Cleaning the Subfloor Thoroughly
With all the major materials gone, the focus shifts to making the subfloor clean and ready for its next stage. Sweeping removes loose dirt and debris, while vacuuming ensures even fine dust is collected. If adhesive remover or other cleaning solutions were used, allowing the floor to dry completely is essential before moving forward.
This stage is about creating a fresh, solid foundation. Any lingering debris could cause uneven spots under new flooring. Taking the time to get it right now means fewer problems later. It’s also a satisfying step, as the room begins to feel like a blank slate again.
Preparing the Space for New Flooring
After carpet removal, the room is essentially reset. This is the perfect time to make any repairs to the subfloor, whether it’s filling small cracks, replacing damaged boards, or reinforcing weak areas. Ensuring the surface is smooth and stable will make new flooring easier to install and longer lasting.
In some cases, an underlayment may need to be installed before the new floor goes down. Having a clean, prepped space means you can move straight into this stage without backtracking. It’s a moment of transition, where the old is gone and the space is ready for something fresh and new.
Disposing of the Old Carpet Responsibly
After removal, the final task is getting rid of the old carpet and padding. These materials are bulky and can’t simply be left at the curb in many areas. Some recycling centers accept carpet, breaking it down into reusable fibers. In other cases, professional hauling services can transport it to the appropriate facility for disposal.
Choosing responsible disposal keeps materials out of landfills when possible. It’s worth checking local options to see if any eco-friendly programs are available. Once everything is removed from the property, the space feels truly complete, marking the end of one phase and the beginning of another.
Conclusion
Carpet removal can be a demanding job, but when approached step by step it becomes far more manageable. Preparing the space, identifying the type of installation, cutting the carpet into smaller sections, and methodically working through padding, tack strips, and adhesive ensures the process is thorough. Cleaning the subfloor and responsibly disposing of old materials completes the cycle, leaving the room ready for its transformation.
For anyone who prefers professional assistance to avoid the heavy lifting and disposal challenges, North Bay Junk Removal offers dependable service in Santa Rosa, CA. You can reach them at 707 478 6817 or email northbayjunkremoval1@gmail.com to schedule a pickup or discuss your project needs. Whether it’s a single room or an entire property, they can help clear the way for your next home improvement project with efficiency and care.